

This is continuation of the Day 1 from UK Masters. Before I get into it, it was pointed out I didn't write about the seminar by Gutier in the first article. That was for two reason, he didn't have anything new on the slides as all the things were showed recently on bigger events by Bostria (so you can see it all online) and secondly, as it was after all three games and I was extremely tired (I was up for around 36 hours at that point), I was slipping in and out of conscious state while sitting down. Some people spoke to him a lot more but I don't remember anything new.
So back to the games. After getting some good night sleep I felt good about the second day. All of the missions were about killing, with the only wild card being the last mission as I never played Firefight before (practice before events really does help if you want to come prepared). However, despite being rested I did made some big mistakes in my games, mostly by not utilizing my army the way it was supposed to be used, especially in the first game.
Game 4: Frontline - Caledonia vs The Neoterran Angels
Lost 1 to 4 (0 TPs)

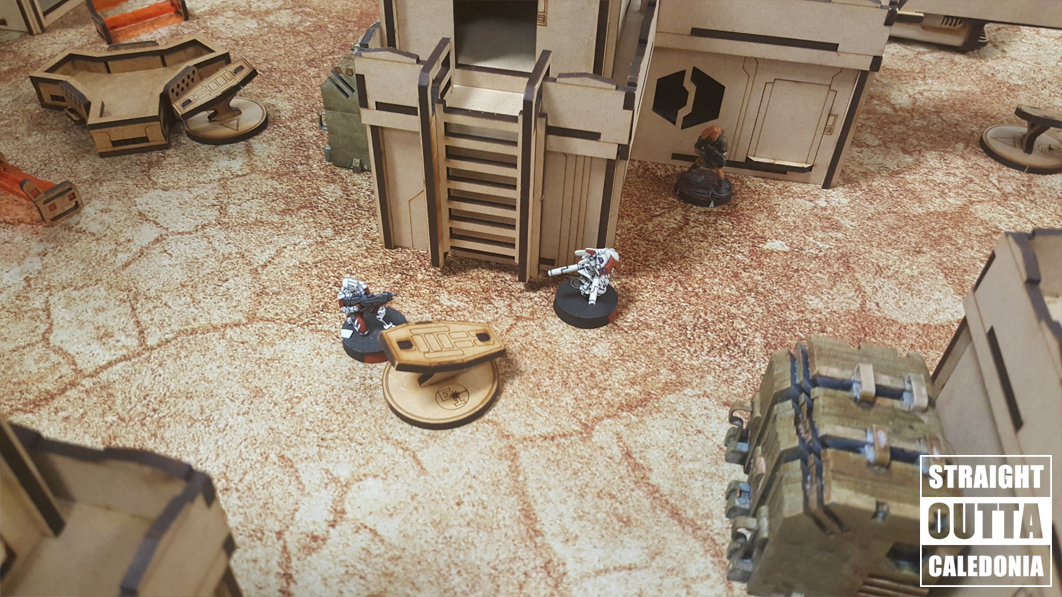
This was a match destined to happen. In the first day Tim managed to get very similar results in game 2 and game 3, we were playing next to each another (one time they even said Tim is playing Peter... but different Peter!). I wanted to play Tim because we always have good games and it was another opportunity to see if I can keep up my winning streak against him. The table we got also seemed decent, with the only thing bit out of place being a lone sniper tower in one deployment zone. It literally had room just for one unit and LoF to almost everywhere. It would have been nice to have it but I wanted to go first and Alpha Strike. So I deployed with that in mind, one SAS getting high on roof just to hold a board section and one failing his Infiltration roll. Tim decided to bunker down in top left corner. It was quote open but far from my Wulvers Link. My first mistake of the game was when deploying Uxia. I remembered Tim had a wierd ALEPH Lt last time we played but she was on ARO position which made me thing its not her (turned out it was at the end). Only after I deployed Uxia near a Total Reaction bot I realized if I went for that ALEPH unit anyway, I could have shotgun my way through like 3-4 troops that were lined up behind her.

Tim dropped a 40mm camo marker as his reserve which I had no idea what it could be as I never seen one in PanO army. My mistake number two: when I see Total Reaction Remote my response is (whenever I can) so snipe it from over 32" away. Its the easiest way to shoot them because they get -12 BS when I shoot from camo state, so its unopposed rolls. Problem was, the table had some tricky line of sights. What you thought you could see you actually could not, so I wasted too many Orders moving my Sniper around. It was stupid as it left me with too little Orders for Wulvers. Smarter thing would have been to just run Wulvers with Smoke cover since only MSV Lv2 Tim had was a Black Friar that could see nothing at that point. Once the TR Rem was unconscious I sent Uxia to finish it off but Tim revealed his Hexa in the sniper nest and she killed Uxia. That pretty much ended my turn. Complete Alpha Strike fail on my part (remember how I said I didn't use my army the way it was supposed to be used?).

In his turn Tim understandably wanted to get rid of my Highlanders and sent Auxilia with Auxbot to deal with them. There was a prolonged fire fight between them and two Highlanders. The Highlander getting Heavy Flamed kept passing high ARM saves, in the end only the other Highlander died. Then the mysterious camo marker moved around to shoot at my Wulvers. It turned out to be Clausewitz Uhlan. First round of shooting nothing happened as he used Feuerbach and we were both at bad ranges, he was shooting against my Mk12. So I kept the Wulver standing up with LoF. Then the son-of-a-bitch TAG pulled out a HMG! I went for Dodge but it didn't save the Wulver sadly. I was dropped down to 4-man Link. At least Tim wasn't mistake free either. He moved up his Bulleteer Rem and put it in Supressive Fire, completely forgetting about a nearby SAS behind a building.

But fear not dear reader, I wasn't finished with my mistakes either. In my turn, first Impetuous Highlander killed down the Auxbot and the Auxilia, dying himself in the process. Then the SAS went back to camo marker state and moved behind the Remote. However, to get into Close Combat he was going to get shot by the Hexa that could see just the very top of the silhouette. You are probably thinking why didn't I just go Prone then? Well because I completely forgot, just didn't occur to me at all. Sometime we miss the most obvious and easiest solution I guess. So I sent in the SAS, killed the Remote and then he got headshoted. Still not thinking straight for whatever reason, I then proceeded to have a sniper-off between Cateran and Hexa. After wasting too many Orders nothing happened. I did get one hit in, but Tim passed the ARM save. My second turn was just as useless as my first turn.

The only good thing for me was that Tim knew how deadly my army can be up close so he was keeping to his deployment zone. Should my Wulvers, even one of them, get within CC distance of the TAG, it would be dead. The Hexa finished the Cateran now that she had the Active Turn advantage. I think he ended up only unconscious. The rest of Tim's turn was moving up some units and putting them on Supressive Fire, making it hard for me to get anywhere pass the middle line.
I sent my Wulvers to a building in the middle, hoping to contest that section as I still had around 140pts in the Link Team left. Though I knew I'd struggle to win either way since the TAG was just too many Points Tim could put anywhere with a single model. I did send Heavy Shotgun Wulver against second Auxilia because the blast also hit the Black Friar. One of them died, I think it was the Black Friar but not entirely sure. Because of how I positioned Wallace and two Wulvers it was hard to judge if they were in the middle zone or the one closest to my DZ, but they seemed to be out of the middle.

Tim went for the win by putting everything he had left (or everything he could get in there with the Orders he had left) in the middle. I think he knew if he went for the zone in front of my DZ he could end up being over-pointed by my Link and then maybe not even hold the middle since I still had camo marker in there and we both had out Intel cards to add points to a zone. It was the smarter move and when we measured it, my Link was not in the middle zone. Funny thing was that if I shuffled the Link two inches forward, they would be in the middle and think would have won on Points by like 2-3pts. It was a fun game for sure though. It had to happen eventually for Tim to beat me!


Game 5: Supremacy - Caledonia vs Yu Jing
Won 6 to 3 (2 TPs)

With three loses already I was not feeling very optimistic about my overall chances to rank anywhere decent, so I was going to this game with the intention of just having fun. I don't believe I played against Phil, my opponent, before but I know we been on same events because he has this really well painted Guijia that I remember seeing on painting competitions. Which funnily enough betrayed his reserve model. I believe I deployed first as I took the first turn, I just remember looking at what Phil deployed and thinking its not enough, there had to be something big in reserve (I don't believe he asked me to turn around or something to place down TO markers for photo evidence). The reserve did turn out to be a TAG in the end.
The table we played on was very open (unfortunately I forgot to take a whole table photo). There was a river running through it with hills and woods enclosed by the river and buildings on the outside. It worked for us as neither had Total Reaction Rems or too many snipers/long range weapons but overall I didn't think the table was that good, most of it was very open and two TR Rems would have shut the board down. The river and woods rules would only do so much. As we were playing Supremacy my plan was the same as always, dominate zones with Wulvers. The plan was to run them down the right flank, lots of buildings for cover would make it easy in theory. The overall goal was to take out the TAG which would reduce Phil's points by a lot.

I started the turn with using Uxia and my SAS on the left. Phil deployed few units in a line which I aimed to exploit with a Shotgun but one of his camo markers stopped me (might have been TO before it revealed, its been a while!). It changed my plan to attacking the revealed unit instead. Phil made a bit of an error where he declared Discover instead of Hold/Delay when Uxia, still in camo state, moved. Which gave me a free shot in my second half. I only took off 1 Wound and Phil decided to fail guts and moved further back around a hill. It meant my SAS couldn't shoot at it so I just put him into Supressive Fire to watch over Uxia. The Wulvers did not run all the way into Phil's Deployment Zone. Mainly beause he had Mad Traps (adhesive koalas) which I didn't want to risk running into. If they were normal mines I'd go tank it but adhesive is a bitch, the risk of being stuck unable to a thing was too high. I ended my turn with Wulver holding down a building in the top right quadrant (from my perspective). The Wulvers did kill a camo Hacker that was hiding on the building.
Phil started his turn with bunch of Impetuous units running at Uxia. I did well (almost by accident) with having the SAS watching over her. She was able to Dodge all the chain rifles while he gunned them down. I am not sure if it was the last Chain Rifle or the wounded Camo Specialist that got her in the end but she did go conscious. Phil also managed to kill one Wulver with his MSV Lv2 Remote by using the Smoke Trick (where he shoots out of Smoke with MSV Lv2). Which I did not think about in my turn. I believe it was in this turn where Phil killed my Cateran (which I revealed in response to a free shot at one unit he moved into open, which I failed to kill) with his TAG but otherwise kept back for now, well after wrecking some faces on my left frank. The SAS did not survive. I did win the first turn on Quadrants.

In my second turn I went for the wounded Specialist. My plan was to send two Highlanders, one to kill him with Berserk, the other to do Coup De Grace for my Classified. It did not quite work out, I run out of Orders. I took a second Objective in this turn (first turn I used Volunteer Medic to take one). Since I had two of the Objectives I planned to destroy the rest with T2 weapons. Unfortunately for me I wasted bit too many Orders on this because I kept missing, even an objective right in front of me! But in the end I did destroy enough so Phil could only get one at most while I had two.
He was more aggressive with his TAG in the second turn, it killed just about everything else leaving me with only the Wulvers, WarCor and one Highlander for the last turn. He did run the TAG all the way into my Deployment Zone (well just in front of it to score quadrants) but didn't move his other units much. My Wulvers were still really close to his Deployment Zone, they could have kill a lot if he wasn't careful with his ARO set up. The reason I wasn't attacking was the MSV Lv2 REM, it was in Supressive Fire with Spitfire and I wasn't on full Link so I didn't want to have a shoot off. I could have go climb around it and maybe get into CC but it seemed too risky for little payoff. One Mad Traps was still around, my second SAS shot one of them.

In my last turn I could have try game it more to have more Objective Points but I wanted to do something cool, like killing TAG in CC. So Wallace and Wulvers backtracked where they came from and run back to my Deployment Zone and towards the TAG. Sadly I was quite short on Orders. It was a long way to run. I only managed to get in Wallace with his 6-4 Movement. I did manage to hit it in CC, might have Crit, but Phil passed the other two ARM saves so the TAG was only Wounded. In his last turn Phil didn't activate it at all! He was just killing my exposed units and moving to quadrants, leaving the TAG vs Wallace combat unfinished. Terrible cliffhanger ending if you ask me but understandable he didn't want to risk it.

In the end Phil did get the quadrants and had one of his Classified done. I had none of mine but I won in two rounds and had two objectives while Phil had none, giving me a minor victory. It was a fun game overall, even though I couldn't a TAG... again... for the third time.
Game 6: Firefight - Caledonia vs Nomads
Lost 2 to 9 (0 TPs)

Last game, last chance to go home with 50/50 record of three wins and three loses. I was paired against Luis and his Nomads with no idea what to expect from this mission. I did want to take a list with very few Specialists due to the scoring of this but because of the other missions I couldn't so my plan was to score higher on everything else.The table we got was one of the Northern Open tables, though I never played on it before. It looked interesting, lots of open places but also lots of crowded ones too, a good mix. Before the game we agreed to only shoot through the big doors but windows were only shooting into the building or out of it, not all the way through. It didn't make much of a difference during the game but its always good to try cover everything with your opponent before you start. For this game I had the first turn, Luis made me deploy first.

I seen a good path for my Wulvers to get into Luis' Deployment Zone so they went onto my left flank. My SAS both went next to the objectives with Booty and I held back Uxia, planning to put her on the third objective. But without realizing it, Luis messed up that plan by placing Hunter with Crazy Koalas there. I should have just put all three Infiltrators to the middle so he couldn't deploy any Koalas nearby but I completely did not think about that. I still placed Uxia on the right flank though, hoping it would clear up. Luis put down Iguana TAG as his reserve, another chance for me to finally smash a TAG! or at least try to.

My first turn was careful assassination of long range threats. I believe I used my Wulvers to kill both Total Reaction REM and Lunochod REM with Koalas. They were both on the left flank inside a warehouse. In Full Link I always feel confident with my Mk12 (unless its camo or Supressive Fire). I did spent the extra Orders to kill the remotes complete, giving Luis no chance to bring them back with Engineer. I also started to roll on Booty table with one of my SAS (on the left objective), he got himself +2 ARM and then ODD. Pretty good I thought. I did move up some of the other units and tried to end the Wulvers in a defensible position (believe it or not, I still struggle to find good end point for my Links). My Paramedic Volunteer who was too short to get to an objective just ended up in Supressive Fire in the open.

Which turned out to be a good thing when Luis began his turn with Extremely Impetuous Morlocks. They were all gunned down by various AROs. One made it to CC with Uxia. Luis admitted he didn't really know Caledonia after she killed him and I explained the only units not good in CC in my army is the WarCor and Volunteer. Luis followed that up with a very bold move. I completely forgot that in this mission, all AD troops can come on any board edge. So he sent his Tomcat behind my Wulvers. Only WarCor had Line of Fire and he decided to Alert so my Wulvers could all face the Tomcat. It didn't stop it from using Flamethrower to catch Wallace and one Wulver with T2 Rifle. That was scary because I tend to keep Wallace as my Link Leader (since he is not suppose to be getting shot), so I couldn't break the Link. It was only Light Flamethrower so I decided to go balls out and just shoot the bitch Tomcat with everyone. The Tomcat got obliterated but my Wulver girl failed two Saves, so she ended up Unconscious. Then the important save on my Lt... failed one but passed the second, so he was on No Wound Incap. Lucky for me. Luis did move away the Hunter with Koalas but then moved up his Iguana so Uxia still wasn't free to just go for the objective. I am actually not sure happened to Uxia from this point on (she had no impact on the game), I know she died at some point though, think it was by the Iguana.

In my second turn I went for more Booty rolls from the objectives. Second SAS grabbed himself a HMG and Multi-Rifle (in the middle), while a Highlander found a Light Grenade Launcher and a Motorbike! (of the left objective.) My Wulvers then moved into the Warehouse, killing a Jaguar that was hiding there. I was planning to launch an attack into Luis' Deployment Zone in my third turn and keep Wallace far away from his units. I don't believe I killed much else because everything was hiding and the TAG was on the other side of the board.

In his second turn Luis was cheeky with his Smart Missile Launcher. Instead of Guided he was able to draw LoF to one of the Wulvers, catching Wallace in the blast. I did manage to Dodge it all though. But it sure made me think about positioning a lot more. The Iguana tried to kill the SAS and Highlander but could only killed the Highlander on the bike. The SAS in cover with OOD was too hard to hit. The Iguana kept moving into my backlines, grabbing itself Booty from objective on the way. From all the things it could get, Luis found ODD for the TAG! So it was definitely out of question for me to try shoot it. I did make one mistake in his turn with ARO. One of his troopers moved to LoF of my Sniper and I decided to hold, then the trooper went into Supressive Fire (no longer in LoF of the Sniper). I should have taken the shot. It would have revealed my Sniper but at least he would have done something this game (he did nothing, not even revealed himself). The Iguana did try to Discover it earlier but failed. In that turn I believe I lost the non-ODD SAS and WarCor. All Highlanders were dead by now.

By the time it was my last turn I have identified who Luis' Lt was, a Tunguska Interventor Hacker. I could have hide my Wulvers and Wallace but I wanted to have some fun (no risk, no gain). In retrospect I didn't need to move Wallace with the Wulvers once he put down Smoke for them but something that I never came across before happened. As I rounded corner with one Wulver to shoot a trooper which was blocking LoF for the Smart Missile Launcher, Luis declared Dodge and said it allowed the other units to now see and declare AROs. It sounded like nonsense but he said it happened to him in a different event and someone else confirmed it so I went with it (later we clarified on Facebook its not intentional part of the rules in the English rule book, its not in the Spanish one at all apparently, and will be removed with FAQ at some point.) It didn't make much difference at that point as he missed, or he might have just kill the Wulver that was going to shoot.

It did threw up my plans either way. Making me use a different Wulver to climb over the vehicle they were all hiding behind to get shot at the Lt. This time though the blast did get more of my people and Wallace died. Luis' Lt survived, either my Dodging or passing ARM saves. In his last turn all he had to do was count what was dead and what was left. I don't think he could get more Booty rolls than I had since I had six and he had only one or two, but on everything else he was winning.
Besides that "trick" at the end, it was quite a fun game and I hope to play Luis again in the future. I also have to say I really liked this mission. It was amusing to see what you can found for troops from Booty rolls. The scoring in the end did not represent how close the game was until the end. If I managed to take out his Lt with mine alive, and not getting my Link killed my Missile Launcher, the huge swing in points would have been in my favour. It is impossible to prepare for something you never came across before but lesson from this could be: just use what you need, nothing extra. I only wanted +1 Burst so three Wulvers without Wallace would have worked just as well. Or even maybe sending just one could have done the trick.
No comments:
Post a Comment