The French army that I took to this event was something I have been wanting to do for a long time. It did not work as well as I thought it might have but I still believe it has potential, I was just not playing as well as I could and it certainly did not help this was the very first time I actually used the French. I should have had few games before the event to get a feel for how they would play.
In the end I lost all three games but some were fairly close until the last turn. All of them were fun though. This army was definitely very entertaining to play. I think I was too excited to keep deploying everything on the middle line of the board, which was not the smartest thing to do. But now I have tried it and I know how to play this army better next time, or so I hope!
Looking forward to visiting Harlequins again the future for more events.
My Army List
What has always attracted me to the MRRF were the multiple units that can deploy outside of the Deployment Zone, its just something I really enjoy in units. So my idea for this list was that none of my units deploy in the Deployment Zone. It does have less Orders than you would expect in an Arianda army but to me its justified by deploying up to middle of the table so you don't need to spend as many Orders moving.
As you can see the army is very simple, four Chasseurs (Infiltration), four Moblots (Infiltration) and four Zouaves (Mechanized Deployment). I would have preferred to have four AP Rifles and four Minelayers but I couldn't afford it all. I would have had to drop either one of the HMG Sappers, or change the Zouave Lt to two Metros (both with Rifles, one of which would be Lt) and a WarCor. It would give me bit more Orders and four Minelayers and four AP Rifles, but it would mean deploying something in my Deployment Zone.
One thing I also thought I should have changed was the Order pools and have one group of 9 and the other of 3. I want to go first with this list but then I was worried my opponent would take two Orders from the second group which only had two to begin with. It would have left my Sniper and HMG unable to do anything if I didn't spend Command Tokens to move units between Combat Groups.
Game 1: Deadly Dance - MRRF vs Onyx Force
Lost 3 to 7 (0 TPs)

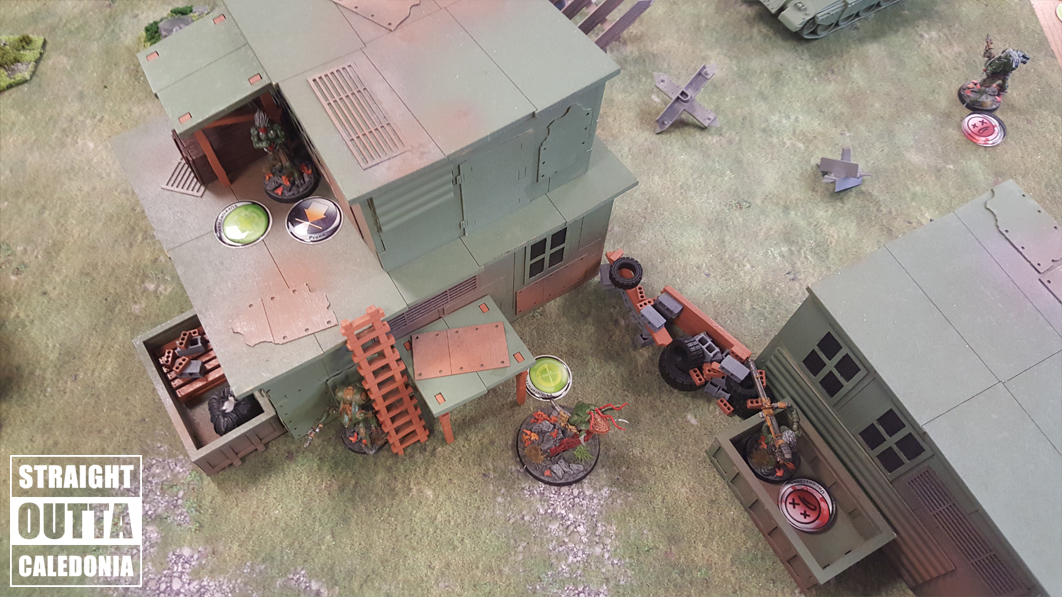
In the first round I played Michael, a new opponent for me. I did not really know the mission but it was quadrant control so I figured I'll deploy everything the middle (as planned anyway) and move my army as needed across the section borders. The only trouble was that I had to be ready to go into either of the four sections so I had to stretch my units across the table. That said I certainly had advantage of being able to deploy on roofs where I could keep my units safe.
Lost 3 to 7 (0 TPs)

In the first round I played Michael, a new opponent for me. I did not really know the mission but it was quadrant control so I figured I'll deploy everything the middle (as planned anyway) and move my army as needed across the section borders. The only trouble was that I had to be ready to go into either of the four sections so I had to stretch my units across the table. That said I certainly had advantage of being able to deploy on roofs where I could keep my units safe.


The first turn I thought went well for me. I couldn't see much but Michael deployed one of his Onyx mini-TAGs in the open as he couldn't get a good hiding place and I could also see his HMG unit that was deployed on a very high tower. Because the TAG was in the open it wasn't too hard to take it out with a Moblot who had AP Rifle, which made the TAG's armour less relevant. The HMG trooper on other hand was a pain as the only unit of mine that could see it was a Moblot with AP Rifle but shooting across the whole board, we were at like 42" range. I was on worse odds as I was on -9 and Michael was only on -6, so I was on BS 4 and he was on BS 6, but I had more dice. I figured it was my best chance of taking out the HMG.

It did work as I managed to kill it on third round of shooting but I admit I was lucky because Michael was getting free shots from a different unit the whole time but I kept passing Armour Saves or he was missing the free shot. The rest of my turn was moving units into my assigned quadrant and putting units on Suppressive Fire. In his first turn Michael moved some units into his quadrant too but mostly just spent the turn killing my HMGs and Sniper with his Fireteam of Batroids, who all had Plasma weapons which are just brutal against any Ariadna army.

In my second turn I moved more units into my quadrant. At the end of the first round we both scored 1 Point, but I did not have as many units in my section as I'd like. I have not really killed much in this turn, only one Batroid to bring the Fireteam down to 3 (I managed to kill one of them on ARO before). I did plan to kill more but those things can go Dogged and I did not want to risk my Moblot being killed by a unit that was going to die anyway, it did not feel like a good trade, so I decided to wait the turn and bunkered down a bit. Michael did not kill much either and also focused on securing his quadrant. He still had a second TAG left and tried to kill two of my Moblots but they were both on Suppressive Fire. It took him too many Orders to kill one of them as the odds were not great and I kept passing ARM Saves. As did the TAG because he was shooting the one Moblot that did not have AP Rifle.


In my last turn I was still in the lead because I killed more units. I saw opportunity to kill Michael's remaining two Batroids (the other Fireteam member was a Nexus) so I went to kill them with a Moblot. Even got them out of cover so I was hitting on 16s but then Michael crited me. I tried to kill them with a Chasseur too but he passed all his ARM Saves and I didn't. In the last turn Michael played smart by moving units to take over my quadrant as I had only two units left there and then moving his TAG to his quadrant, netting him more Objective Points in the last turn and winning the game.
Game 2: Firefight - MRRF vs Onyx Force
Lost 2 to 6 (0 TPs)

My second opponent was Luke, we played bunch of times before and it was always fun. Unfortunately for me though he also played Onyx Force so I had to face more Plasma, what a joy. The table was interesting and I was able to take advantage of deploying the middle of the board, very close to the objectives where my units could get new weapons/gear from Booty tables. The only trouble for me was that I couldn't really advance on Luke's army as he had lots of high ground in his Deployment Zone; I took the first turn again so Luke decided on the sides.

The funniest thing about this game was that it could have been over for Luke in my first turn. He deployed his Link Leader and Dr.Worm on the highest roof, part of which was just outside of his Deployment Zone and I managed to Infiltrate one of my Chasseurs there. The plan was to kill the Link Leader, kill Dr.Worm and then mop up the rest of the Batroids that would be out of the Fireteam. If the Chasseur lived he could have also kill more units from his high vantage point. What happened instead, I needed 14 to hit, I rolled 15 and 17 while Luke rolled double 1 and killed the Chasseur. Very anti-climatic ending for me. After that fail I spent the turn taking Objectives and putting units on Suppressive Fire.

Very similar thing happened in Luke's first turn as it did in the previous game. Though instead of a Fireteam doing all the killing, it was a Plasma Rifle Q-Drone that was given Marksmanship Level 2 that did the damage, taking out my HMGs and Snipers. Though I did manage to kill it in one ARO in the end. As Luke spent all his Orders on the Q-Drone, he didn't do anything else. He did reveal a TO unit in his Second Group that tried to take out a HMG of mine before the Q-Drone but it did nothing. Luke missing his free shots when I was on -12 and then I was able to tank the other hits. My second turn was also about taking more weapons from the Objectives, stupidly I ended up with two units on Motorbikes which was not helpful.

I also managed to kill the TO Unit (a Malignos) but it cost me a Chasseur. The trouble I had was not being able to get close to Luke's units but it wasn't large advantage to him as he couldn't get down from the roofs either. He did have an AD Trooper which he wanted to use to kill my Lt, but it scattered off the board and landed in his Deployment Zone. He then used the AD Trooper, who had a shotgun, to attack one of my Chasseurs (who was now on a bike) and a Moblot. The odds were not great for him at first, I hit him twice but he kept passing all the ARM Saves and even when he failed the AD Trooper had a Survival Form that kept him alive, so frustrating. I lost both the Chasseur and the Moblot in the end and the AD unit even tanked two mines.

There wasn't much I could have done in the last turn, I just used my last three units to go out and attack anything they could, getting them killed in the process. It was throwing away units but it made no difference at that point besides fun ending.

I definitely feel I could have played this mission smarter but I started to think about the objectives of the mission too late. What I should have done instead of deploying everything so far forward was to get into defensive positions where Luke couldn't attack me from his high roofs and just take out what I could with Chasseurs, and also taking the Objectives. If I managed to kill one or both of Luke's Specialists I could have then waited the game out, forcing him to get down from the roofs and get closer to me if he wanted to get any weapons from the Objectives.
Game 3: Supplies - MRRF vs PanO
Lost 0 to 2 (0 TPs)

My last opponent was Tom and his Jesus-worshiping PanO, someone I also enjoy playing against and it was good to see him on tournaments again. The table we played on was very unique and also open, so we decided to play the trees as solid terrain that completely blocked Line of Sight and was infinitely high; we both felt it made the table lot better as you could actually move around. Supplies is like my favoute mission but I was stupid and didn't take three Specialists as I usually would, I only had one. So my plan was to take one objective and then completely surround the other Objectives with Mines so Tom couldn't get to them. But Tom won the Lt roll by 1 and decided to take the fist turn.

Just like in the previous games, the first things to die were both HMGs and the Sniper (I really need to deployment them better). Tom had a Jotum TAG which just wrecked them, I didn't even had chance to put the HMGs on Suppressive Fire. But he also made the mistake towards the end of his turn where he left the Jotum in the open without realizing I had an ARO after his second Move. This ARO happened to be a D.E.P. from a Moblot in my good range and then I rolled a Crit! Which managed to take out the Jotum. Fun time for everyone.

Tom had just enough Orders to run an Engineer Palbot to the TAG and bring it back (after spending two Commands Tokens to re-roll). But he didn't leave any Orders spare to put things on Suppressive Fire so in my first turn I was able to take out the Jotum with AP Rifle and then Coup De Grade it with one of my Chasseurs; which died in the process but so worth it. I have also managed to get another Chasseur close to Tom's Remote with OOD and burned it, which also killed Switch (Hacker with Holoprojector Lv1 that was pretending to be a second Joan of Arc). After the REM was reduced to Mimitism I was able to kill it with a Moblot. That was end of my turn.

Tom's second turn did not go as well as his first. The rest of my army was in hiding and I still had mines around the objectives (planted by Minelayers at deployment). I got lucky with an ARO against HMG Remote that Tom wanted to re-position, making him spend more Orders on his Engineer to repair it after I killed it. The most frustrating thing for me was that Tom run with Joan to the middle and into cover, where I killed the Jotum, and put her into Suppressive Fire.
I got tunnel vision on her and wasted too many Orders and units trying to kill her. It did not work, even when I managed to get behind her. I really should have just kill the other units and ignore her but if I killed her, Tom would have been in Loss of Lt and not able to do much in his last turn, basically allowing me to win the game as my Forward Observer Chasseur was still alive and hiding. It was a high risk with a high reward but it did not pay off.

In his last turn Tom mopped up some of my units and then was able to grab one of the objectives (one that didn't have mines around it anymore). I had only two units alive at the start of my last turn and just for the moral victory and run into the open and shot the Tom's unit that held the crate. I had my second crit of the game and killed her, which would have been a draw as neither of us controlled any of the Objectives but Tom did his Classified while I forgot about mine, so he won by two points.