Wednesday, 9 March 2016

Caledonian Volunteers Corps

The Volunteers Corpare arguably the backbone of almost every Caledonian army. They are the our Line Troops; our cheerleaders, but on top of their generic duty of proving Orders they do have some interesting options to add to your army.

These guys are one of the most, if not the most, versatile units in Caledonia when it comes to the profile options alone and as such can be played in many different ways. Therefore please keep in mind I am only covering the ways I play them in and my own thoughts, but there could be more uses for them I am not aware of!


Profile

The Volunteers profile is below average for a line trooper, but this is reflected by their cheaper cost. Going as low as 6pts I believe they are the cheapest Regular Troops in the game. Everything about their profile is really basic, though I often found ARM 1 very handy. Their Special Skill Multiterrain (Jungle or Mountain), I have never used thus far but it is these if you ever play on a board with terrain rules. They are also Linkable if you play then in Caledonia, they can't link in vanilla Ariadna.

Standard Weapons

In total we have four "standard" weapon options. First lets look at the 0 SWC options, a Rifle at 8pts and Chain Rifle + Light Shotgun for 6pts. If you take the Rifle, your best bet is often using them as Deployment Zone (DZ) protection in Suppressive Fire. In cover they get up to ARM 4 and it gives you Burst 3 ARO with -3 Modifier to the enemy. It does make a good speed bump if nothing else.

Even better option in my opinion for that role is the Chain Rifle option. It is super cheap for a Regular Trooper and gives you a large template. This is a great deterrent for groups of enemies, like Link Team and can cause some serious damage if people are not careful. It also makes people think twice with 1 Wound models, no matter how good they are, Chain Rifle is a guaranteed hit at DMG 13. The Light Shotgun is good when you face someone up close and want Face to Face roll, with up to +6 BS, even BS 10 Volunteers is now hitting on whooping 16!


For an extra 0.5 SWC you can get a HMG for 19pts or a Light Shotgun with Light Grenade Launcher for 10pts. Now lets just take a second to appreciate the fact you can have, if you really to, TWELVE HMGs! That is just insane amount of firepower and you still have 72pts left in 300pts army. In all seriousness, the HMG is a decent long range weapon if you can't afford pay Points (or dont want to) for the Heavy Infantry options. Even if you don't take twelve, they are cheap enough to easily have two or more. With Burst 4, even if you are at BS 10, you can usually out-roll people but you do have to pick your targets. Elite Snipers will take you down more often than not but other Line Troops will likely try to dodge, especially if they don't have a long range weapon.


The last weapon I have not used often but I feel like I should. Light Grenade Launcher gives you the option to Speculative Fire, which is a great way to take down pesky Infiltrators and other units in hard to get places. The best use is combined with Forward Observer so you can remove the -6 Modifier to Hit but even if you can't, just get to the good range band (over 8" but within 16") and you'll be hitting on 7. Its not great but its probably still better than anyone else going against OOD or TO Camo (without Multi Spectral Visor Lv2, which we dont have in Caledonia anyway). If people get too close, you have a shotgun to use.


Inferior Infiltration

This is something you don't see on Line Troops outside of Ariadna (as far as I know). For some additional points, you have option to take Volunteers with Inferior Infiltration and Limited Camouflage. This means that you have to try deploy on the enemy side of the table and you do so as a Camo Marker, which gives you one Surprise Attack (you can't go back to Camouflage). It is a risky business though because they are deploying on -3 PH, which means you have to roll 8 or less for them to get there. So its not something you can rely on.


The two options you have is a Rifle with D-Charges for 0 SWC and 11pts, and Light Shotgun with Light Grenade Launcher for 1 SWC and 13pts. Personally so far I have only used the first option. I like to take it sometime in case I draw Sabotage for Classified Objective. Which is basically plant a D-Charge in the enemy half of the table, so if you land, you can just get it done with a cheap trooper. Something I haven't done yet but think would be great to do is to run this Volunteer into CC and plant the D-Charge on some enemy trooper. With Limited Camo you also get Surprise Attack (if you don't do Surprise Shot) which gives -6 MOD to enemy instead so you have a good chance to win CC unless they are really good at it. If you succeed, you can then use your Engineer to blast them to hell with the explosive.


The other option in theory would allow you to do good range Speculative Fire shots on the enemy Deployment Zone, something that could do decent amount of damage if you target a group of troopers. All they can do is Dodge at -3 PH if they can't see you. Downside is, you could waste lots of Orders and do nothing, so don't get too trigger happy. Also remember you have a shotgun, so its better than Rifle getting up close.

Paramedic

This is the only Specialist option Volunteers have. Unfortunately we don't get a Forward Observer like most other Line Troops. It only costs 2pts more than a regular Rifle option, which makes the Paramedic the cheapest Specialists in Caledonia. It is a good option if you want to add extra Specialist to your army and they do give you the MedKit option during the game.


Best use I found for these guys is healing Cameronians and McMurrough. Chances are those guys, if Unconscious, are somewhere in the open and you don't want to risk your 112 Doctor to go there. The Volunteer on other hand is more expendable, so send them in and you have the same chance to bring back the Dog-Warriors as you'd have with 112 Doctor. Cameronians and McMurrough have PH 16 so with -3 they are coming back at 13 or less, which is the same for 112 as their WIP is 13 and you can't re-roll anyway because Dog-Warriors do not have Cubes.

Also keep in mind you can shoot the MedKit, so you don't have to go base to base. Only downside is that you have to Hit before you have a change to Heal someone.

Lieutenant

Last but not least, the Lieutenant (Lt) option. The Lt comes with the same weapons as a regular Rifle option and costs exactly the same as well. Which is very useful if you want to hide your Lt. You can easily have two or three Volunteers with Rifles hiding somewhere in your DZ and make the enemy guess which one is the Lt.

This is the cheapest Lt option in Caledonia, so when you don't want to use any other Lt this is a great option. Myself I do sometime use this option as the next cheapest Lt options cost almost triple (23pts).


On the battlefield - Fireteams (Link Teams)

Overall the Volunteers have some useful and potentially fun options but personally I think where they really come into their best is in a Link Team (also called Fireteam in rules). In a full Link of five, the HMG especially becomes much more aggressive in the Active turn. Usually you'll be shooting someone in cover in your good range which means you'll be on BS13 in general, and with Burst 5 those are pretty good odds. Now if you catch someone out of cover you can do it on BS16, or best on BS19 if they were Targeted by a Forward Observer.
 
But again, I can't stress it enough, pick your target. Even in a full Link, a HMG might fail you against an elite model and even against a basic HMG Remote, you are both almost on same odds. Best is to target single shot AROs, like snipers and other Line Troops. 


In a Link the Volunters also become much more effective in the Reactive Turn, everything from Chain Rifle to Light Grenade Launcher becomes Burst 2 which is a lot of templates. This is how I prefer to play them, defensive Specialist escort. One set up I like is two HMGs, Chain Rifle and Paramedics, or one Paramedic and one Light Grenade Launcher. As a Link they can usually hold their own around an objective.

In conclusion, it is very likely you will have some Volunteers in your army to give you Orders but despite their cheap cost and below average profile, they can help you toward victory and you'll be better off if you try to make the most of them.


My miniatures

I wanted all my Volunteers to look like they are from a single unit. The two main inspirations were Scottish Black Watch Regiment (to paint the tartan and hats) and Browncoats from Firefly (for their brown coats). Currently I have seven painted (with three more to do), six of which have the same colours with minor differences to differentiate between them, and one in camouflage jacket to be my Infiltrator Volunteer.


Sometime I think they are all quite dark comparing to other Infinity models, but considering they wear cloth and maybe leather instead of shiny armour, I think it looks good.


And something I found out only when writing this article, the motto "Bydand" that appears on the Volunteer Corps logo means "abiding, steadfast" which is a motto of a real Scottish Clan Gordon. Their tartan seems to be blue and green with yellow lines so I am considering to add those yellow lines onto my Volunteers kilts to give them more colour and make them a Clan instead of a unit.

 
Most photos in this article by James from Gribbley Gaming.

Thursday, 25 February 2016

High Value Target

When it comes to High Value Target (HVT) I feel like they are becoming increasingly more important in ITS missions, especially those where Classified Objectives are worth 2 points each and of course Highly Classified mission which can end up being all about the HVT. So I been thinking, is it better to deploy HVT in the open or hide them? Is there a "best place" for the HVT?


Open vs Hidden

Personally I tend to always place the HVT behind a building or some other piece of terrain so my opponent can't spot them easily with Forward Observers. In many games my opponent placed their HVT right in the open, which I thought wasn't a good choice as it meant my own FO can see them but most of the time it didn't end in my favour for other objectives. The other HVT objectives are about getting a hacker within their ZoC, and Engineer or Doctor/Paramedic base to base.

After trying it out myself I think having a HVT in open makes it easier to protect it. Especially if you have lots of elevated positions around your deployment zone, you can cover most, if not all, approaches to the HVT. This might not stop your opponent getting base-to-base but it might make them spend more orders avoiding and/or dealing with your AROs. The more Orders they spend on HVT, the less they have for attacking else where, which is always good. You just gotta make sure to maintain your defense because if your unit leave, the HVT is just right there in the open. 

If you happen to have a really good hiding spot in your half of the board, I'd say that might be the best time to hide the HVT. Otherwise, more times than not I end up blocking my own Line of Fires to the HVT or at least limiting them a lot. One game I played recently, my opponent had bunch of containers in his half which were touching edge of the board and arranged in such a way that I would have to go around the whole thing to get close to the HVT and that was a problem since the Classified were getting base to base. Even climbing over the containers would have taken lots of Orders. It put the game in his favour from the start. That said, I wouldn't expect these kind of hiding spots happen often but its good to keep an eye for them.

Overall I am getting more in favour of putting HVT close to my own deployment zone and in the open where I can protect it with defensive troops, or even just cheerleaders that won't be leaving the deployment zone.

"HVT Shield"

I still haven't figured out how to make this a viable tactic but it is good to remember nobody can place templates on the HVT intentionally. Or even if you can, if you kill it you lose the game so nobody in their right mind  will do it. This can be used to your advantage.If you are near the HVT it is unlikely people will be able to target you with things like missile launchers and even flamers/chain rifles can be hard to deploy near the HVT.

The HVT also has Silhouette 2, like a regular trooper, and block Line of Fire. Therefore if you see some small line across the board that you want block, you can use HVT to do it.

Going off on that, do be careful with placing mines around HVT. Your opponent could avoid it by hiding behind the HVT, or just in a direction where the mine would have to go over it as mine templates cannot be placed over Friendly or Neutral models. The mine would neither not trigger or some people said it would be lost. (Rules citation to be added but to me it sounds more like it wouldn't trigger.) Either case, it is a way to avoid mine templates.


Best place for HVT

This was on my mind for a while, is there a best place for HVT? By that I mean being able to place the HVT outside of ZoC of any potential enemy trooper so they can't hack the HVT from the start of the game. I made this handy graph to find out, no there really isn't.


This of course is assuming there is no terrain preventing enemy Infiltrators deploying right on the edge of 24", or an Exclusion Zone. Since you have to deploy the HVT withing 8" of the middle line, they can almost always be in ZoC from the get go.

Looking at the graph though I think it might be a good idea to deploy the HVT close to the middle if you know your opponent has access to Airborne Specialist. That way you can force them to spend extra Orders getting to the HVT from the side. At the same time though, you can lure the AD Specialists and set some traps for them if you have TO troops.

My miniature

I wasn't sure how to paint my HVT but in the end decided to go with red and black because it helps make the HVT stand out in my Caledonia and I really like red armour, I just try to avoid it in Infinity because I done too many of those in my wargaming years. I also took inspiration from the studio Alguaciles for the blue hair.

Overall I am happy with it but I wish I was more careful priming the face as it came out bit too rough for my liking, though its only a problem when you look really close.


If you are interested in how I paint faces, I wrote about it in this article.

Wednesday, 24 February 2016

How I paint faces

The other day my mates James asked how I paint faces/flesh and while I think its a simple process I tried to explain, figured I'd do like a "step-by-step" to show it with pictures. I am not going to claim this is some "pro-paint" tutorial, just how I paint my minis, so keep that mind. Cheers.

For flesh and faces I generally use only three colours, five if I want to add bit more detail. The colours are:

1. Ratskin Flesh
2. Kislev Flesh
3. Reikland Fleshshade
4. Ceramite White
5. Evil Sunz Scarlet


These are Games Workshop paints, but if you are using a different brand its basically dark flesh colour, bright flesh colour, flesh ink/wash (its kinda brown-ish), white and red.

Step 1 - Base + Wash

To start with I pain the whole face (and any flesh parts) with the base dark flesh colour and wash it. This will make it bit more darker.

As a word of caution, it pays out to take time with the undercoating of a face. More than once I ended up finding out the surface isn't smooth anymore because I used too much paint which left tiny clumps. But its only noticeable when you look super close.


Step 2 - First Highlights

Then I use the same dark flesh colour to start highlights. Its hard to see the difference on a photo but in person you can see the new layer is bit brighter.


Step 3 - Second Highlights

 In this step I sometime go straight to the brightest flesh colour I have and build up highlights with watered-down paint, or first do a layer where I mix the dark and bright and then pure bright.


Step 4 - Details

I don't do this on all models, but when I do I mix some white into the bright flesh do to small very bright highlights on the cheek, nose and sometime chin.

The red is for female models, where I also mix it with flesh to tone it down and then pain the bottom lip to make it stand out.


Step 5 - Eyes

Lastly, when the model has big enough eyes I first pain a strip of white horizontally and then put in a dot of black. Sometime I do it in three steps there I do big black stripe first, then white and then pupils. It is often a painful process so I am looking for a better way, but it does the job.

Alternative (faster) way

On some models I combined Step 1, 2 and 3. I paint the face with dark colour, do strong highlights with the bright colour on top and then wash it to blend it in. I do this on older miniatures where the faces are small, or when you can't see much of the face.

Also for line troops I don't often do Step 4 and 5, even without details and eyes they still look good on the table. Below are some more explames of faces I have done for my Japanese Sectorial Army. 


Tuesday, 23 February 2016

WarCor in Caledonia

This is a first article of many that should be coming over the next several weeks (probably months). Majority of my Caledonia models are half painted, which in my case means that they have everything painted in basic colours, maybe a layer of wash/ink and a base but it all lacks highlights and detailing. I really want to finish my army and write about my experience with the units, so I have decided to try write about them as I finish painting them so I can include pictures of my models in the articles.

I wanted to do WarCor first because I think it is a very underrated unit and I use him in most of my armies. Next will be article about High Value Target.


So to get right to it, lets talk about how Warcors fit in Caledonia and why I think they are great.


Profile

At first look there is nothing really special about the WarCor profile, basic MOV, below average CC and BS, average PH and WIP in Caledonia, no ARM and BTS and standard 1 W. The Journalist L1 skill doesn't do anything in a regular game either and there are no official rules for Aerocam per say (though it has been used as 360 Visor). On top of that they are Irregular, which means generally they can only use their Order. Combination of all of this, despite its extremely cheap cost, is likely why many might not give this unit a second thought, I know I didn't use to.

Weapons

It is not until you look at the weapons that WarCor becomes appealing. We can more or less discount the Knife because you'd be lucky to hit in CC. The Stun Pistol is great on paper as it can send anything with Wounds (not Structure) Unconscious just by failing 1 BTS roll (thought I couldn't find if it works on 2W models or if those just loses 1W) but usually you'll be hitting on 12 at best, which you can bump to 15 if you plan ahead of Target the approaching enemy with FO first. Use of Stun is sure situational but it is a goo tool to have if you need to accomplish Coup de Grace.

This gets us to the best thing about WarCor, the Flash Pulse that can Blind. Since its a Technical Weapon, you use WIP instead of BS, which means between 8" to 24" you'll be hitting on 16. I would say the Blind state is very underestimated by players, in most games I get some "free" unopposed rolls because people don't think it will do much. Until their hard hitting unit is Blind and can do very little for rest of the turn. While Blind, you can only do pretty much only MOV skills and CC, anything that needs LoF is unavailable. The worst/best thing about Blind is that nothing can fix it, it remains until end of the player turn and there is nothing else that can be done about it.


In Caledonia

You might have thought this already; most of this applies to WarCor in just about any army but there is one thing that makes this unit even better in Caledonia (and two other armies in the game).

If you take William Wallace as your Lieutenant, his Inspiring Leadership makes everyone in your army Regular (among other things). This effectively means you are gaining an Order for 3 Points! This is the cheapest Order that you can get. You can only have one WarCor but it is almost always better to have that extra Order than not.

As I mentioned earlier, this can be also done in two other armies; PanO and Military Orders where Joan of Arc is Lieutenant. She is the only other model in the game (thus far) to have Inspiring Leadership.

On the battlefield

Taking all of this, how does it apply to a game? The best use of WarCor I found so far is mid-range or long-range ARO threat. If you put him in the right place, he can sit there the whole game and just generate an Order. People who know how crippling Blind status can be will think twice and spend their precious Orders killing a 3ptd mode, and people that don't know it are likely to leave their models exposed.

I like to use WarCor in what I call a "buddy sniper system". Basically you place this guy in a place where he can see the same places as one of your snipers (or other long range AROs). This will force your opponent to either split their Burst or give you a free unopposed roll. I can't promise this is guaranteed to work, but in my experience most of the time people either face the WarCor and the sniper, or they go around trying to pick off the WarCor first. Which again, helps you as well because while they are spending Orders killing the cheapest unit in your army they are not killing something more expensive (and likely more useful), or better, they are not doing the mission objectives.

Other but similar use that I found useful was protecting Deployment Zone flank. This is especially useful if you think your opponent has Airborne troops. If they land where your WarCor can see them, you have a chance to Blind them before they even do anything, which is definitely worth it.

Overall, I'd strongly suggest to anyone to get a WarCor and try it out yourself. Give it few games and found your best use for them.

My miniature

Last but not least the painting part of this article. The photos above were taken by James, you can find more awesome photos from events and games on his blog.

My intention with the WarCor was to make him look like a civilian with some military gear, so I went with white shirt and blue jeans for clothing and the same greens for the military vest and leg guards. I was going to make the helmet green as well but I really liked how the yellow looked on my Dozers.

I was quite happy how the detailing came out too. Though I might revisit this mini in the future to add Caledonia flag somewhere and put PRESS (or BBC) on his helmet.

I didn't plan to paint the eyes at first but on this mini they were quite big so it didn't look without them.


This was actually my first attempt at painting chips on armour. I only did very few, just to try it out and figured the WarCor wouldn't be too battle-worn. I am happy with how it looks so I'll be definitely doing more of these on other models.


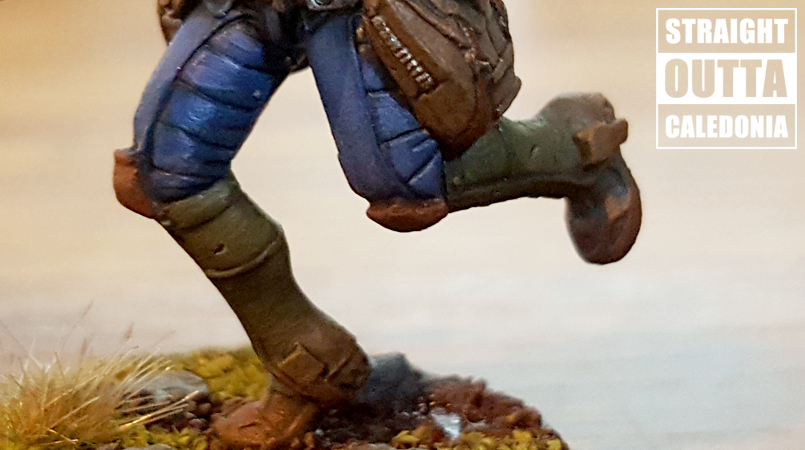
It was hard to take a good photo of this but I noticed part of the basing was missing so I decided to make it look like a little mud puddle. In person you can also see slight gloss on the bottom of his boot.


Northern Open 4

Last Saturday I have attended Northern Open 4 event as Tournament Organizer. I quite enjoyed the experience of seeing a tournament from a different perspective. There is lots of work behind the scenes that I don't necessary think about when I go play but I can certainly appreciate more all the hard work that goes into events from the organizers. Northern Open is one of the biggest events we do up here in North, I think we always had around 20 players after the first one, so it was quite busy but having experience from our previous events I think we were ready for everything.

I would say the busiest part was before and after the event. We had to set up 10 tables in less than hour and a half and then clear them out just fast afterwards, but lots of people helped out both times which was great to see. I had a chance to play two of the three rounds as we had odd number of people in the end, and that really made me realize I should think about table set up even more. I think next time I'd at least measure where the deployment zones are and consider the missions more so you don't end up with objectives and HVTs in the most awkward places. I know, I know, games of chance are not really about always fair but at the same time I don't think unfair advantage is good for the game either.

As I walked between the tables I found it lots of fun to see how the games went and hear all the crazy things that happened, I think on one table someone managed to kill Achilles with a USA Grunt, in CC at that! It was also good opportunity to see all the different armies and how people played them, which you don't have time to do much when you are playing.

Surprisingly, our defending champion of NO3 ranked 3rd of 4th and my mate James who won last two events we went to also had some bad luck. In the end it was Yorkshire Renegades that took the crown this time. Will see if they can defend it in May!

These were the ten tables we had:
(more photos from the event can be found on Facebook groups and the Infinity Forums.)


Monday, 1 February 2016

Weekend Warlords: Yorkshire returns victorious!

On Sunday the 24th we went to Loughborough in somewhere not-Yorkshire, but it was my mate James who scored the first place. We both did very well in our first game and had unfortunate match up against each another for the second game, which to my bad luck was Nimbus Zone. We practiced the mission like two days before and he won that too. I was doing okay at first but had some bad luck and made mistake of spreading myself too thin, maybe going first wasn't great either. Last game I was confident about that I could pull it back, but ended up loosing by a lot.

Its been a while I lost two games out of three, but its not the new ITS season yet so I am happy to get my bad games out of the way!

Game 1: Quadrant Control - Caledonia vs Combined Army
Won 8 to 1

We played on a very open board, there were no long fire-lines but there was lots of room between terrain pieces which made it difficult to maneuver around without going into open. My opponent had a small army, half his points were in Morat TAG and Sogarat Tempest Regiment with HMG. From my perspective he had Sogarat on the left and TAG on the right. With the rest spread in between. I also had fairly small army, only 12 models. I deployed Wallace and Wulvers in the middle, Cameronian and McMurrough on each side and SAS in camo infiltrated as far as they could. I chose side and deployment, my opponent went first.

Table from my side.

The start of the game was fairly uneventful, I deployed with almost everything hidden so the only shooting happened between Sogarat and my Cateran sniper, but neither of us died. My opponent moved up most of his units so that he had around 100pts on one side, and 150pts on the side with TAG. I wanted to assault across the board to take my opponent's quadrants but I was too cheeky and didn't think it through. The idea was to run my Wulvers across the board and split them so I had more points in both quadrants, but first mistake was that I was completely oblivious to the fact I did not move across the middle line and second that I really only needed to take one of his quadrants, not both, so I should have just charge into one of them with the full Link. Albeit I did not and we both got 1 point each. My Cateran also managed to put the Sogorat unconscious.

The luck turned against my opponent in his second turn. He did bring back the Sogorat with Automedkit and survived the free shot I had at it, but then I won the next attack and since he was on 1 Wound this time, the T2 sniper bullet took him out. Then the most unlucky thing happened, he moved his TAG forward to attack McMurrough but I also had a shot with WarCor. With the ARO I managed to Critically Blind the TAG and McMurrough dodged away, he couldn't flame it because my HVT was in the way. In my turn I more or less managed to secure board dominance, though I did lose two Wulvers in the process. One T2 Rifle died to a Plasma hit, he went against two of those Remotes and managed to kill only one. The second Wulver with Heavy Shotgun died from Fire. I attacked the TAG and hit it three times, but he flamed me and I failed three rolls in the row. Though he also failed all three of his rolls and the TAG went down, which was very unlucky for him. With my last orders I also killed few more troops and moved up to claim my opponent's quadrants.

In his last turn my opponent had less than 75pts on the board, he moved around defensively but all I had to do in my last turn was to switch my Classified to Secure HVT so I could score 8 Points because I couldn't do any of the ones I drew. I had enough Orders to probably finish the last few troops standing but we ended the game there.

I really did not do much with my other troops, almost everyone survived the whole game because I used the Wulvers the most. The SAS especially just sat Prone on a roof in the middle of the table. 

Game 2: Nimbus Zone - Caledonia vs French
Lost 4 to 7

This board was also very open, with few blocks of terrain but not much scatter in between. My side had the advantage of the highest level on the board but it was without cover and at that time I did not know how to make use of it without leaving my snipers exposed. I had army of 20 troops and James also had like 18 to 20 in his French army, so there were troops everywhere. I deployed everything more or less hidden, because I knew James will too and my skirmishers went as close as possible to the objectives but not as close as I'd like because of Exclusion Zone. I went first in this mission because James won the roll but chose to go second.

Table from my side, but objectives were removed.


I started my turn as I usually do in these kind of missions. Camo Markers move forward and try to take Objectives. If memory serves me right, I got both of the objectives I could get in first turn and then spend the rest of my orders positioning myself for the second turn. I dont think I killed anything in my first turn because everything was hidden or just too far and across the nimbus zone. I don't remember where James spent all his Orders because he didn't do any of the objectives but he did shot at few things and set up his skirmishers in annoying positions for me.

As soon as it was my turn again, I started to blast the objectives James didn't capture in the first turn to deny him Victory Points and secure 3 for me. I destroyed both of them but I should have just stop at one because then the Nimbus Zone was gone, which was good and bad at the same time. I was on a good way to win but I knew I could still loose because I would have to stop James from downloading and controlling more of the objectives in the middle. Which was hard, for starters there was one objective I couldn't get to as it was on a platform with no ladders and he had a skirmishers deployed on it from the start. The other two were more or less in the Open and I did not have enough Orders to get more troops to them so I was relying on my SAS to hold them, which James knew and send his troops to take them out.

In the last turn I was just trying to minimize the damage but it was more or less a win for James. My army was pinned down but few of his troops on high up positions and a Paratrooper with HMG on the ground. I was pretty unlucky with my Linked HMG as it took like twenty shots to take out a single trooper, and then not to mention where James passed like five Dodge rolls when my Cameronian attacked his Link Team in previous turns. I wasn't even able to do my Classified Objective because he killed my Hacker. In the end I ended up only with 4 points but I learned a good new tricks.

Game 3: Highly Classified - Caledonia vs Corregidor
Lost 3 to 9

I was going confident into this mission, up until then every-time I played Highly Classified I scored high. Which was my only chance to rank in the first three. I wasn't sure what to expect from Corregidor though I knew hacking I don't have to worry about. I am not sure now who won the Lt roll but I went first and my opponent made me deploy on the most bare deployment zone that I have ever seen, literally it had no cover and I had to rely on level variations of the ground and buildings to hide my troops. The Objectives we had were Doctor the HVT, Coup de Grace someone, Doctor your own trooper and Engineer your own remote. I also drew Data Scan. In my opponent's deployment zone, there was a bridge that extended out of it and he deployed two troopers of his Link Team on it, which made me Infiltrate Uxia right in front of them and I passed the roll. We both passed all of our Infiltration rolls actually, he had a Bandit in Camo and I also had a Volunteer.

Terrible image, I know but hopefully gives an idea of the table.

The first turn went good and bad for me at the same time. Uxia managed to kill one of the Link members (dying in process but she did also active both Crazy Koalas, which was worth it) and my SAS Forward Observed his Total Reaction remote which was next to his Link Team and took few Guided Missile shots. I also managed to take out some Jaguars I believe, reducing his Order pool by a chunk. The bad thing was I did not managed to get any of the objectives. I dont know why but I had this stupid idea moving one of my SAS around too much and wasted lots of Orders on it. My opponent managed to get at least one of the Objectives because he healed one of his Link members after he brought in his Tomcat Doctor.

The next turn I killed few more things and I did my Data Scan with my Link Team but I spend lots of Orders running them to the opposite half of the board where the enemy HVT was. I think for some reason I was worried taking on the enemy Link Team that was protective the HVT (it was in the open right in front of them) even though I had the advantage of numbers and range. I also tried to Doctor someone but failed that roll. My opponent did better, the Tomcat managed to get to my HVT and get that objective, then if I remember right his Classified was to hack my HVT which he did with the Bandit and he also Coup de Graced one of my SAS. He also killed my Doctor by finding a good route I did not see, I thought my Doctor was hidden well.

In my last turn I got Coup de Grace with my Cateran (thank you climing plus) and I made my Traktor Mul fall two times but it kept passing its ARM save and I run out of Orders for it. In desperate move I run my Link Team across the board into open trying to get my Paramedic to the HVT but that failed too. My opponent couldn't get the last Classified as he did not have any Remote left to Engineer (not sure if he had an Engineer on the board). 

Looking back at the game, I don't know what happened but I made some pretty bad decisions. From the start I should have move my Link Team across my Deployment Zone, get close to the enemy HVT, take out the Link Team and lock down that side of the board. Which would have given me a better chance to do the objectives. I am still glad its not the new ITS season yet! This is the final ranking provided by Tim the Organizer:


Sunday, 17 January 2016

Meeting the Yorkshire Renegades

The idea of taking a break from events did not last long at all. Its only like second week of January and I have been to my first event of the year. Me and James went to visit the Yorkshire Renegades, a neighbor gaming club from the God's Own Country. It was just a two games-six players mini-tournament, but it was still a good fun. Renegades have some cool looking tables too, some of which they bring to Northern Open tournaments.

Instead of my usual Caledonians, I took Morat Aggression for this event. It has been a while since I played them. I'd say Morats are my second favourite army to play, they have no Camo tricks but they don't care about Lt or Guts or Retreat, which I think is a neat thing.  

(Images with the Renegades logo were not taken by me.)

Game 1: Highly Classified - Morats vs Haqqislam
Won 9 to 4

For this mission we have drawn these Classified: Extreme Prejudice, Test Run, HVT: Designation and Sabotage. I also got Telemetry as my Secondary. My opponent was relatively new player so I helped him out a lot. The game actually came out quite close, I only won by a lot because the mission is built that way; if you achieve more Objectives you get 4 points and they don't get any for achieving less. I had the second turn and it came down to my last roll. I was trying to Forward Observer someone and instead of just FOing an Unconscious unit that was almost right in front of me, I went against someone shooting at me for no good reason. But I did luckily roll a Crit on my WIP with the last Order.

The table we played on from my side.

Another stupid thing I did, you know how they say no battle plan survives contact with the enemy? I think its more like, no battle plan survives the deployment phase. In the list for this mission I specifically took a second Hacker, a Morat Vanguard, so I'd have access to supportware for remotes. I even took a remote with a Repeater so is easier to give my HMG Total Reaction remote Marksmanship Lv2. Then I deployed the Vanguard Hacker and the Repeater on the other side of the board away from the HMG.

More of the table from my side.

What was quite funny, and frustrating for me a little, my opponent had some kind of heavy infantry with HMG on a roof. We were shooting at each another across the board, diagonally so we were always over 40". Even with his -6 BS, he managed to take out two of my three AROs, my HMG in a Link and my Yagoat Sniper. I put him unconscious, but then he had a Doctor Plus unit around the corner and brought him back. This happened like two more times.

The table from a different side, not during my game.

Overall it was a fun game and I hope I tough my opponent few things, we even had some hacking battles between his Hacker and my Zerat Hacker. If I failed that last roll, I think he'd either won or we'd tie. 

And this is me playing.

Game 2: Annihilation - Morats vs Nomads
Won 9 to 6

In the second game I was pretty stupid with my Classified. In this mission you have two worth 2 points each, which is pretty good so it is a good idea to actually do them. When I was selecting my Classified I kept thinking I do have a Zerat Hacker in my list because I almost always do when I play Morats. So I chose HVT: Designation and Sabotage, which is like a great combo for Infiltrating Hacker with D-Charges. I really should have remember I did NOT take that option and instead had a normal Zerat with a Combi-rifle. But I realized like mid way through deployment so I had to just live with it. In the end, my Engineer had to run across the board and get himself killed to get Sabotage done and in the end I had to change my second Classified to Secure HVT. I had the last turn and my opponent already done both of his Classified, so I also had to get both. 

The table from my opponent's side.

I was quite lucky though, overall I rolled like six to eight critical rolls during the game. Since the mission is about killing but also keeping your army alive, we both just shot at each another from safe distances of our deployment zone. There were plenty of funny moments, like when my opponent Airborne Deployed a Hellcat behind my Vanguard Link Team, but didn't realize one of my guys was facing backward so I did Alert! which made the whole Link Team turn around and then when he activated the Hellcat again, it was just shot to death.Without knowing it, I also did a full burst into his Lt at one point, I think either with Kornak or my HMG Remote but he survived. I found out it was the Lt only at the end of the game.

More of the table from enemy side.

My Link Team, HMG already dead.

I think the "worst" Crit I rolled was when my Tempest Regiment was advancing against his HMG Remote. I just couldn't kill it so we ended the turn in front of each another, and in my opponent's turn he had the advantage of Burst 4 over my Burst 1. We were within 8" so I decided to use a Pistol and rolled a Crit.

Tempest Regiment advancing....
... get some Nomad Remote.

In the end, I managed to outkill my enemy. Morats had 209 pts alive (229 with Baggage) and I killed 219 of my opponent's army. I have no doubt the luck on my part was a major help. If my opponent managed to kill Kornak and the Tempest Regiment,  I'd been down by 100 pts and he'd have more alive.


And I got a nice certificate for my Morats, so I am happy!

Thursday, 14 January 2016

Ride or Die! (updated)

Corvus Belli has released videos and images of the new Desperadoes models and personally I think they look pretty badass. We have already seen concept art for these guys so the bikes look quite as expected, a stripped down version of the USAriadna military bike. I like how each bike looks different, its a nice touch. The riders are also very individual but they seem to fit the overall USAriadna theme very well. I am definitely gonna get a boxset when they are released for sale.

Same as last time (with the Airborne Ranger release), I wanna take a guess at their rules and profile!
Update; it was pointed out to me on Facebook Ariadna group that I have overlooked some available information! Thanks Nick and Casper.

Image from http://www.beastsofwar.com

So, what do we know so far? The models shown have Boarding Shotgun and a Heavy Pistol. The CB's 360 video says 2 Heavy Pistols so that might either be a standard equipment or an option to have two, I am guessing they will all come with one. The same model is also carrying what looks like SMG on his back, but it could be a Rifle. It is a SMG according to concept art. I would think most of their weapon options will be more close to mid-range, since the Maverick cover the bike option with long range firepower.

I will also guess the bikes will come with the standard Smoke Light Grenade Launcher. It might be a wishful thinking, but considering the availability of Light and Heavy Flamers in USAriadna, I think these guys might have the option to have them too. Which would be so cool! If not Flamers, they might get Chain Rifles at least. Chain Rifle does show up on the concept art and int he USA book, so flamers were likely really just wishful thinking! The art also shows normal Smoke Grenades which could be useful as they can Dodge with those and use them if they dismount the bike.

As far as special skills, they will likely have Extreme Impetuous. According to the USA book, they appear to have normal Impetuous but Irregular training.

Its hard to say what else they might have, maybe Berserk to help them in CC? I don't think they will have MSV Lv1 like the Maverick does. It would be cool if they had something like Booty Lv1, it would fit their fluff. Speaking of fluff though, they might have Forward Deployment or Mechanized Deployment. That would be super rad.

My guess at their profile:
MOV 8-4,  CC 16, BS 11, PH 13, WIP 13, ARM 3, BTS 0, W 1, S 4, AVA 2/5*

As far as cost, probably between 18 - 28 Points.
My guess for cost seems to be too high, the USA booklet sample armies show Chain Rifle option is 11pts and 13pts for SMG.

* 2 for Ariadna, 5 for USARF sectorial.
I am also wrong about the AVA for Sectorial, USA book says they will be AVA 6!

I am skeptical of them having a Specialist Option, but almost everything in USAriadna does so they might have Forward Observer or Paramedic option.

Saturday, 9 January 2016

Army List Tactica 4: Phoenix Tournament Winner (Biotechvore)

This is one of the two lists that I have taken to an ITS event in Phoenix Games last year. It was the first tournament I have won and this list helped me to define how I want to play Caledonia in this new year of 2016. Though there is sure room for improvement as you'll find out, and its far from guaranteed to win you games (but that goes for every army in Infinity).   


Overview

One of the missions in the tournament was Biotechvore, so this list was pretty much tailored for that mission. Though it could also work for other killing-type missions. In basic, in this mission the goal is to have more Points alive than your enemy. Its made harder but the fact that 16" of each side of the table is "virus" zone that hits any units with Damage 14 hit against their BTS. So you end up with 16" strip in middle of the board where everyone wants to pile up their army. It can be a brutal mission and it can be very hard on Order Management. My plan was to have a tough, hard hitting Link Team, some units that have a chance to Infiltrate, some fast moving units and then few standard units to provide Orders and do Classified.

Achieving the mission

As you can see, more than half my army points were in 5 models, Wulvers with Wallace in a Link. Since they are fast and Wulvers have Climbing Plus, in theory I would be able to move them outside of the virus zone in 2 Orders, saving me 3 Orders for other units. Cameronian with the Highlanders would have it easiest, since they generate two Orders each they can use on themselves. Up to three of my other units, Uxia, SAS and Volunteer had a chance to Infiltrate (you have to pass a -3 PH roll first in this mission to do it), which would leave only two more units (Dozer and 112) needing to move.

I think the theory was sound, but as it often happens, it didn't live up to the expectations. In my game only SAS was able to Infiltrate and my opponent made me burn lots of Orders on the Link as I didn't have easy direct routes, he had lots of AROs in my available paths. That said, with Smoke and shooting some enemies with the Link, they did get where they needed to go; albeit sacrificing some other troops in the process as I run out of Orders to move everyone.

Having an expensive Link Team also worked in my favour in this mission. With 2 Wounds each and ARM 3, they were hard to take down for my opponent.

Units purpose and performance

William Wallace with Wulver Link Team - This Link Team is my new favourite thing in Caledonia. They are very tough, hard to kill and able to deal lots of damage. They have only three weapon options, Mk12, T2 Rifle and Heavy Shotgun but all of those are very useful in a Link. Best of all, all of them are 0 SWC! I think they also have lots of tricks on how to overcome enemies, since they have Grenades, Climbing Plus, Berserk and Natural Born Warrior. As expensive as they are, 32pts cheapest, they are well worth the points. I am certain they were key to my victory in the mission, since only three of them surviving was over 100pts.

I'd say the whole mission almost favours Link team like these. Everyone has to get within 16" of each another to avoid the virus zone, this limits powerful weapons like sniper rifles and HMGs, but gives advantage to mid range weapons. Spitfires are expensive so often you'll face combi-rifles or multi-rifles, but if you have this Link in cover, they are able to shrug off D13 weapons with their ARM6 (with the cover bonus).

As far as Wallce, I think if I didn't have to take him to make it a full Link Team, I probably wouldn't have. I would prefer to have 5 Wulvers, but their AVA is only 4. That said, especially for this mission Inspiring Leadership is quite invaluable for Order management. Plus he can prove Smoke for the Link Team, so he is helpful. Just have to be careful about where you leave him because he will have big target on his face from the start of the game.

Cry 'Havoc!', and let slip the dogs of war. (image from Corvus Belli store)

Uxia and S.A.S. - In this missions, its a 50/50 for them to be able to Infiltrate (better for Uxia), so they can either be very helpful or not so much. In my game SAS was able to do it, while Uxia had to deploy normal. She did die trying to pull off a desperate action, but I was in a desperate position at that time. The SAS did nothing the whole game but hide, which in this mission was good enough.

In retrospect I could have taken two SAS FOs or just two Chain Rifle SAS (or one FO and one chain rifle). This would have save me few points, and either help to double my chance of getting any FO related Classified Objective or provide good attack options with the Chain Rifles since the enemy troops would go towards them. Between Chain Rifle with Grenades or Shotgun, I'd go for Grenades in this mission so you could do Speculative Fire from roofs and such.

Dozer and 112 Emergency Service - These guys were mainly taken to cover Specialists slots but I think I would been better off with one better unit or fewer cheaper units; for example Volunteer HMG and Chain Rifle. Though the glue gun on the Dozer could have been useful to keep the enemy in the virus zone, so maybe just drop the Doctor. Looking back I think the best option would have been to drop them down for another SAS and Warcor. This would still give me two Regular Orders thanks to Wallace but have potential for better tactical options. 

Volunteer - I didn't want to have too many models, so I had the Points and even with Inferior Infiltration he still has a chance to deploy forward and in this mission, if he fails he can deploy normally, so to me it was worth it. However, looking back I feel about him the same way I do about the Dozer and 112, might have been better to have a more useful unit. The D-Charges are nice but have little use if he can't pull of the Infiltration.  

Cameronian and Highlanders - I think these are great options for this mission. Any troops that can generate extra Orders greatly helps to move out of the virus zone. I specifically took four and placed them in the same Combat Group so I could do Coordinated Orders with all of them. Maybe two Cameronians could have been more useful because they can move faster and are tougher, but I like using the Highlanders.

Plus with some changes to the Combat Groups, you could have Wallace to Link with these guys, move them out, then re-Link with Wulvers. Making it even easier to manage your Order pool.

What worked

The Wulver-Wallace Link Team was definitely the main thing that worked for me. They were able to move fast, had their own Smoke cover, took lots of punishment and dealt it themselves. I was glad I had them with mid-range weapons over other hard hitting units with weapons like HMG or Missile Launcher. The Highlanders and Cameronian did good too, I was able to Chain Rifle a group of enemies more than once (although I was unlucky and mostly they all survived). Plus as I mentioned before, extra Orders were a good help.

I think if you break down the mission to the bare bones, I think Caledonia has great potential because they can move fast with lots of Smoke cover.

What didn't work

The cheap units were more or less useless, like my Dozer died straight away, but this was mainly because I used too many Orders on everything else. So in a way they did their job by proving Orders to others. I already said it few times, but I would have prefer to have more tactically versatile units like the SAS, or if I kept the cheaper ones, have more long range AROs to use.

You might have notice by now that my longest range weapon (good range that is) was only 24". This was for two reasons. Firstly I didn't want to leave anyone behind and snipers are always better being as far back as possible. Secondly, I challenged myself to use an army that had 0 SWC spent. Which, if I am honest, was a stupid unnecessary gamble. Cateran would have been very helpful in this mission, and with their Climbing Plus, they can be deployed in high places and still be able to move fast out of the virus zone.

Verdict

Overall I think this list has some good foundations but it does need some tweaking to improve. Its weak point are the cheap units that can't do much if your Link Team can't leave the virus zone quickly. The next time I'll have to play Biotechvore I think I would try to go with the Wulver-Wallace Link, Dozer, SAS FO, SAS Chain Rifle+Grenades, Cateran, Warcor and two Cameronians. 

List on Army 5

Saturday, 2 January 2016

New Year, New Army... sort of

The holiday weeks are almost over and the New Year is upon us, time to get back to Infinity. 2016 should be a good year, the new ITS season is coming in February and in the UK we have an event like every month, so plenty opportunities to play. I thought I'd be taking a break until March but there is a tournament in Loughborough around end of January that we'll be going to. More importantly though, this year UK is having its first Masters Tournament, which should be great fun as it will be the biggest one I believe. This will happen in September and there are five or six qualifier tournaments before. I will be attending at least two of them but might go down South for a third if I don't qualify in Leeds or Birmingham. If I remember right about half the tickets to Masters will be open for sale but I would like to attend as qualified.

This brings me to the new army... sort of, part. I will continue to play Caledonia but I want to play it differently. Mainly by making use of Scots Guards which I have hardly played last year. Plus I will make use of the other units I have hardly played, like Mormaers. Basically I want to play the same faction, but differently.

Luckily, most of my Caledonia has at least basic colours but it still has long way to go before being finished. I just have too many models and I wanted to get them all done to the very basic level, so they look okay-ish on the table. I also have four other armies that I want to finish to at least table-top standard. Which is one thing that worries me, if I can do it all. I think I should be though, if I do at least some painting each week. To give you an idea, here is what I have to paint:

Caledonia - 45 models, 10 not painted and/or not based.

USAriadna - 19 models, none painted

Nomads - 25 models, none painted (includes my Bounty Hunters)

Morats - 37 models, 7 not painted

Military Orders - 23 models, none painted

Only my small Ju Ying army is fully painted, but I only have like 13 models for those. So, for only unpainted thats 84 models, 119 if I count that none of my Caledonia is fully finished. This doesn't include some of the stuff I want to buy. Its going to be challenging but I am sure it doable if I don't buy too many new things.

On top of that, I have my gaming board to do. I think I have all the buildings, just need to build them and the scatter. Most of it I will just spray with a single colour, grey, military green, black or brown. When everything has some colour, then I can go into details. My goal with the table is to have it ready for Northern Open in May.

In conclusion, my "Infinity Resolution" is pretty much just get on with painting and win a tournament in the new ITS season.